Tuesday, November 20, 2012

Battle of Intombe River - Sudan style


For our club’s regular Monday game I ran a Sudan version of the Battle of Intombe River on 19th Nov 2012. The chap with all the Zulu stuff was otherwise engaged and as all I have is the Sudan stuff it made sanse as it was within period. 

We use Battles For Empire for out Colonial rules by Chris Leach as they seem to produce a game that for us feels right for the period. There is a yahoo group for discussion on the rules and also said scenario in the files section.

I set the table up as per the scenario, the scenario allows the Brits some leeway in deploying tents but for a first go we did it 
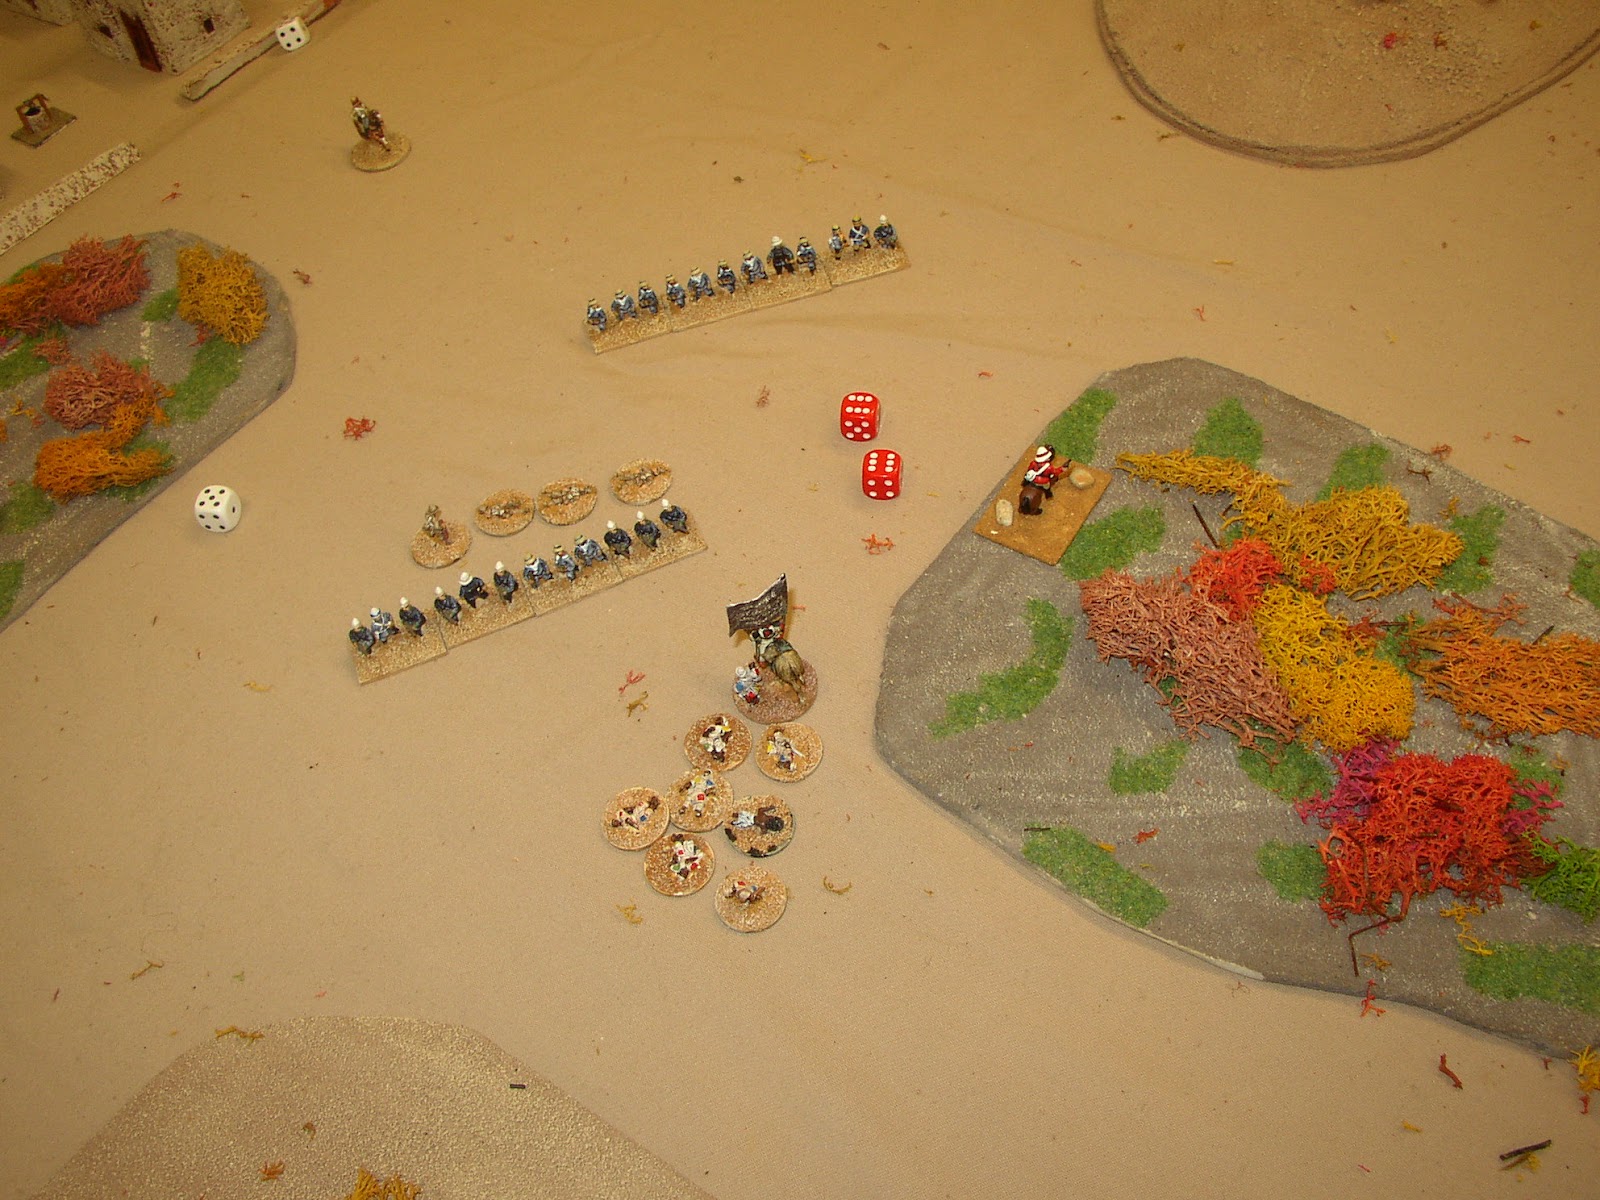
‘properly’. We used a 6by4 table with 15mm figures, my Imperial are based 3 to a stand and each stand is 3cm wide, natives are 5 to a stand and each stand 6cm wide. Each unit has 4 stands meaning an Imperial line (4by1) matches a massed foot formation (2by2). Each pair of tents represents a commander or unit for the British, the rocks in the river show the location of the ford.


Alan Millicheap led the Dervish on the left, Rodger Williams running the centre and Alan Paull of Suprised Stare Games on the right. Shaun Mutton of Dreamholme Scenics took the British north bank, a hospital pass if ever there was one, whilst Graham Bevan took the south bank; their mission is to get of the south edge of the board with 3 units (so get 1 off the north bank to the south), the dervish just have kill 4 units thus prevent 3 escaping.. I umpired, took pictures and generally had a great time.

The Dervish deployed right up tight to their allowed distance on to the table so only cataclysmic results would prevent a historical opening of the battle. The Dervish now won the first of many critical initiative rolls and charged.

Initiative in BFE can be critical at certain times in that you may want to get away or force your opponent to take his Unit Conduct Chart (UCC) tests before you. In this case it’s important as the Brits have to try and wake but if the Dervish move first they can be on to Brits in turn 1 (which is historical). Sure enough Captain Moriaty outside the apex of the laager was overrun in turn 1. A unit on the left flank was also hit with a rude awakening whilst the rest of the Dervish tore through the larger. The Brits did manage to wake the units on the south side, one in the middle of the laager and one on the left flank.

The Dervish start with 10 units out of 30 on the table, dicing twice for reserves each turn from the 2nd onwards; I used the Zulu reserve charts so we could replicate the Zulu Chest, horns and Loins tactics that the scenario dictates. As it happens we could have saved time and given all the reserves to Alan as on turn 2 he managed to get 2 lots of 3 units on to the left horn for himself (top right of picture).

 
This continued for most of the game until the last couple of moves when the Loin chart was finally activated and Rodger got a couple of units in the centre. Alan Paull got no reserves but his team graciously let him have some of theirs.

Whilst the Dervish now poured through the laager one British unit take the sensible precaution of backing off to the other side of the bank. Meanwhile the loud screaming and gunfire appears to be insufficient to wake a unit of British. The British on the south bank elect to retire to try meet their victory conditions.


Turn three see one British units wiped out whilst the one on the far left comes under attack. The British on the right finally wake after the Dervish actually clamber into the tents and set about. The unscathed unit continues to negotiate the swollen ford.


The sleepy British lose their unit on the right but the south bank units realise they only way to win is to ensure 1 unit gets of the north bank so they push back up to provide covering fire. The British to the left see off a unit of Dervish as the initiative roll becomes all important again. The Dervish are no in a position to catch the unit in the river if they move first.


The Brits win the initiative and the unit makes it over the river to join the other 2 units. Meanwhile the last British unit on the north bank is dispatched. And the Dervis pour across the river.

Interpenetration in these rules is limited so it’s important to ensure commanders are in the correct place to affect UCC rolls and the order of picking units requires some thought. The mass of troops often means a log jam for the native troops in these rules and this scenario was no exception for the Dervish trying to follow the Brits across the ford; co-ordination is key. Of course it wasn’t help by yet more reserves arriving at the Devish left horn, all trying to get to the river.

The trick for the British is now to stall the Dervish by having the lead units fail UCC rolls and paralysed as a result, this would mean the Dervish would be stuck and those behind also stuck. Catch-22 is that to do this they need to score hits and accumulated hits result in destruction of the unit thus clearing the way for other units to plough through. So it is a meat grinder but actually quite tense as if the Dervish can contact the retreating line and cause hits the British will crumble due to attrition.

As it happen the Dervish now get a unit across and crash into the line .


Volley fire sees said unit trashed at no cost to the British line.


Calamity now for the British. Using commanders to boost the UCC result the Dervish get 2 fanatical charges as they exit the river and they smash into the thin red line. Desperate point blank fire and hand to hand combat see both the fanatic charges destroyed but the central British unit took a beating and is on 7 hits, 8 and it gets destroyed.


The British kept gradually retreating but did not take measure to protect the damage unit, mind you, with 7 hits it would struggle to get a decent UCC result to escape anyway.

More Dervish now pour across the ford.


Those units are shot down in an astounding round of firing by the British and destroyed. However it reopen the space for more Dervish to race forward. Meantime the Dervish have instigated a ticketed queuing system on the north bank so that the fording is orderly….


More devastating fire decimates the Dervish but there’s thousands of ‘em and they are now out of the river in force….


And eventually numbers tell. Despite taking 7 hits on the way in a Dervish unit hits the central British and scores that all important last hit to wipe out the 4th unit.


So a win for the Dervish and pretty much spot on to the historical result. In reality some troops did make good their escape but not thanks to Lieutenant Harward on the south bank who ran off and left them, nor Captain Moriaty whose incompetence got him killed right at the start of the battle.


The scenario does have to potential to look like it’s a case of mowing down natives but no more so than playing Rourke’s Drift. The odds do not favour the British at all and they need the first initiative and to get everybody awake then they could possibly sacrifice 2 units on the north and escape with the rest, but that’s a lot of luck needed. Re-positioning the tents and making the laager effective (as was recommended historically by Major Tucker) would give the British a much higher chance.

The bottleneck of the ford means  the natives need to be organised as they cannot deploy on the south bank – I did wander about this as the scenario does not say, but I assumed as the river was swollen and that was the only ford about that the natives were restricted to the north bank.

All in all another good fun game brought to you by the Berkeley Vale club.

Friday, October 26, 2012

Tuesday, October 9, 2012

Retrieve the Guns!

So last night I hosted our game as the usual venue was closed for refurbishemnt. We decided to do 15mm Colonials for a bit of light heartened fun using Battles For Empires v2; it's not out yet but the QRS is on the yahoo group and Chris has kindly talked us through much of it. I also had printed off the random event cards from http://www.angelfire.com/games3/jacksongamers03/colonial_card.htm which looked like they'd add something to the game.

The dastardly Dervish had captured some fine artilelry pieces from the British and planned to use them against river traffic and so prevent use of the river by the British. The old Coptic monastery (centre left of pic) had been identified as the location of the guns, accordingly the British mounted an expedition to recapture the guns and teach the Dervish a lesson. 


In charge of the Dervish was El Al with his two trusty lieutenants Al Shepaheed and Al Rojar, they had 4 cavalry units 5 skirmisher with rifles, 3 spear armed units and 3 smoothbore guns.

The Imperials were commanded by Colonel Unwin with 2 companies of British foot and 1 cavalry. He was assisted by Major Kiwi commanding the Egyptians, 2 Infantry , 1 cavalry and 1 arillery and also Lieutenant Manley who by co-incidence had the naval contingent, 1 unit of sailors, 1 unit Marines and a field gun on the paddle steamer.

The Dervish Decided to ignore the town and protect the passes to the old monastery; the Imperials when for a split attack with the Naval troops securing the town and docks whilst the Egyptians and British lines went for the shortest and supposedly quickest route.
  Lieutenant Manley arrives on the paddle steamer.
The Imperials aim for the quicket route. Far centre the Dervish cavalry cover the rocky hill and rough ground threatening the British cavalry.
Dervish skirmishers disorder the advancing British line... then take a kicking for their trouble.
The Dervish cavalry are charged by Egyptian cavalry who were behind the British cavalry... they'd rode on past by this stage.  The Dervish had already taken hits from the gunboat to their rear when hit, they needed to roll big to do well in the combat..... Oops.
Meanwhile the British cavalry hairs up the table to take the monastery only to be intercepted by Devish mounted. Egyptian Infantry advance to support them.
The Dervish throw in more units whilst the cavalry slug it out. Gordon Pasha, long thought dead arrives to take command of the Imperials for a turn giving them all +1 on Unit Conduct Chart.
 
Britiah and Dervish mounted wipe each other out leaving infantry to finish the job. Meanwhile the British foot, after taking a kicking from Dervish artillery on the hill finish of the flanking Dervish. The Dervish got the Belch of Alah card and gained an old 12pdr gun to help them out on random events.
Naval contingentt finally disembark...but Binky Pasha now turns up and takes command. The bumbling bafoon gives all Imperials -1 on UCC and they suffer for it.
Egyptian cavalry and Dervish destroy each other.
The Naval boys advance out the town but there's no one left...
The last Dervish mounted go for a valiant charge, both units die to a man...
   Dervish foot sally out to charge the Egyptian  infantry led by El Al himself!!
El Al's unit vapourise and double 6 means he's gone too!!
 

So in the end it was more or less a draw, with both armies almost wiped out (army morale is so passé), the British made it across the board although in hindsight might have spent a couple of turns to take out the Dervish artillery and wait for the Naval contingent. They only had the Egyprian arty, 2 naval companies and the naval gun on the boat left, the dervish had 3 units of artillery, 1 unit of massed natives and El Al was dead.

We are still not sure if we are playing it right as it's based on the QRS and various notes from Chris. The Dervish artillery seems much more effective now since all hits are kills (each unit can take 8) and they are carried around with you; in v1 where units could take 4 kills only the Dervish smoothbores generaly only did 1 hit which caused disorder and no kills, only if they were lucky and you were in close range did you suffer 2 hits to cause a kill.

Either way good fun all round.

Saturday, September 22, 2012

Neck of the Swan - Wetteren Sept '44


Neck of The Swan, Wetteren, Belgium, Sept 1944

The Pre-amble

So having finally sorted my new garage and organised my storage I decided it was time to have the grand opening of my gaming room. I wanted a good sized multiplayer game to be played over a couple of week. I opted for WW2 as each player could command a company and I’ve been desperate to

a)      get motivated to finish rebasing my infantry
b)      paint up some of the backlog of buildings and vehicles
c)      become more conversant with BGPG2 ruleset
d)     get my hardly used WW2 toys on the table.


For the scenario I picked this one: http://www.fireandfury.com/scenarios/wettern.pdf
Kindly put up for sharing by the Fire & Fire Battlefront WW2 players. They have a full selection here of great scenarios http://www.fireandfury.com/scenarios.shtml. Many thanks to them and in particular R. Mark Davies, who helped me out converting it for 20mm and the BGPG ruleset.

Since the scenario is documented above I’ll leave off OOBs etc… and stick to pics and the exciting action.

Here is the initial town layout. The keen observants might notice some additional track road added in later pictures, I’d forgotten to place it at this point.


We had 3 players on the  Brit side, each commanding a troop with one acting as senior commander to make decisions and hand out Action points; the Germans also had 3 players, 1 CO with the pioneers, mortars and AT gun whilst the other two took a company each.

Before we proceed I apologise to those that feel I’ve let the side down with some unflocked bases, the players cared not and although I prefer to have all figures completed I was stepping in to replace a planned game that could not go ahead. I had intended to do the game in a few weeks so had to make do.

The Battle

 The Germans deployed in two concentrations with a company each, one to advance parallel to the water edge taking the fields between the town and the river Schelde, covered by yhe AT gun. The other supported this assault from the North. The mortars far out of sight and the pioneers held in reserve to do their job.

The Brits have few troops and can’t hold a full perimeter so elected to hold North and south ends of the Bridge and the far NW of the village, each area holding 1 troop plus their supporting vehicles.

Germans advance across the open as their first move, not bothering with smoke or clever stuff like that and paid the price, very quickly losing a platoon to fire from the houses and .50cals on the halftracks. The support from the North pushed through the woods to set up position to help out.

The Germans were not helped by losing control of the game by failing command rolls twice and going FUBAR in the first couple of turns.

The Brits in the NW buildings soon came under fire from the assault to the North so could no longer support those covering the fields. They managed to prevent the Germans exiting the forest completely but could not halt the swing around on the German left which could cut off any Brits to the West. The Germans also pressed on their assault pouring in 2 more platoons and managed to clear the troops defending the hedge on the edge of town to take the first row of houses.


Continued heavy firing by the Germans to the North managed to suppress the Brits and the Germans lined up for the house to house assault.


The assault is a huge success after the early losses and setback and the Germans are surprised to find they come under no further fire from the houses in the centre of the board. In fact the solitary Brit stand squad that runs for cover to the bridge makes them realise the Brits do not control any buildings on that road. Desultory fire from buildings NE of the bridge indicate there are more enemy there.


Meanwhile a straggling unit of panzergrenadiers move East along the roas South of the river attempting to find a way across, the Brits on the south side move to counter this threat.

The Germans consolidate in the outer houses and the Northern advance continues to link up with it.


You’ll notice now some of the Germans bases have been finished – I was busy over the weekend between sessions :-).

On the Southern side of the river the British attempt to use the halftracks to prevent the Germans from moving towards the bridge but the AT gun and MMgs return fire to quickly put the halftracks out of action.


For the Brits Lieutenant Colonel AD Hunter now arrives on table and speeds off to meet Major Fitzgerald. The British now prepare to defend the bridge  and ensure Fitzgerald gets away.


The Germans now prepare to assault the yellow topped building to cover their final assault on the bridge. Meantime British AFVs rush forward to block any German plans to control the roads. The AFVs are soon dispatched but not before allowing Fitzgerald (Humber LRC top left) to get away and call up reserves. German pioneers make their way through town (far right).


The Germans find no one in the yellow topped house and British firing fails to prevent them taking up residence. Just as they pile in the cavalry arrive. Cromwells roll into town but tread wearily as the Germans are bristling with schrecks and fausts.

To get more cover the Germans call in smoke on the bridge and advancing armour. A Firefly appears in the NE of town (bottom left).

German infantry rush across the North end of the bridge and take the final house needed to cover the pioneers. Again lack of firepower prevents the British from stalling this attack


The British armour risks the AT weapons of the German infantry and zip through town to protect the bridge as the Germans have now moved the pioneers into contact with the bridge. It’s looking desperate for the Brits.


Meanwhile further British reserves arrive on the scene only to be met by the mmgs now controlling the roads in and out of the Eastern side of town. Those Brits that make it are hampered by smoke.


The Germans bring the fausts round to the Bridge and brew up a Cromwell whilst a brave Dingo attempts to mow down the Germans loitering around the bridge. The straggling Panzer Grenadiers continue to advance towards the bridge hoping to escape capture.


The German company commander brazens the Bren fire from the Dingo as he calmly waits for the pioneers to set the charges an his infantry exchange fire with the British in the houses on the South.


The Germans having laid their charges vacate the area and blow the bridge first time round taking down the poor Dingo in the process, but leaving their fellow stragglers to the South to spend the rest of the war as POWs. In final insult to injury the Firefly goes up in smoke.


The Autopsy

My table is 8by6 but I like a bit of space around so I used me 7by5 terrain sheet and compromised the map slightly. 

Historically the Brits won, but it was very close. They were engineers, not ideally suited to holding a bridge against determined enemy. That said they performed well and repelled the assault leaving the bridge clear for the advancing formations to cross the river.

As for the game, well, the British players felt they had too little a chance and the Germans players thought it finely balanced and a great result… Go figure :-)

Lack any real support weapons other than the .50cals hampered the British but the Germans and myself (as umpire wondered if they’d  bitten off more than they could chew and tried to hold the town too far out with the 1 troop. Once the Germans were in a position to attempt close assault on the first house the British had little support fire from neighbouring houses. After that the Germans actually reached the bridge unscathed more or less.

This was stark contrast to the early moves when the Germans took heavy casualties trying to move parallel to the river. The straggling Germans were just added early to give the Brits more to think about as it looked like the Germans were due to be trounced. In hindsight they were unnecessary.

I did bring forward the arrival of the reserves as after the initial setback it then looked like the Germans would reach the bridge very quickly. Even so they were unable to prevent the German success. A key point was that German mortar fire in the first two sessions was ineffective and actually caused friendly fire!! In the last session it was always spot on!!

The British suggestion to ‘balance’ it more was to have Germans start further back to allow more time for the reserves since more troops would patently be against the historical oobs. The Germans and I all thought the Brits could have held a tighter perimeter. The players did not ‘know’ various deployments but the clues were all in the briefings, the British could have chosen to effectively ignore the South side and just left token resistance there as a calculated risk; they had after all technically arrived from there the previous day.

Either way all had a good time and if the autopsy starts pointing fingures at leat you know they cared and were involved and hopefully had a good time. We might try again something swapping sides just to see how hindsight changes things. If any one else tries the scenario let us know how it goes as we’d be interested to hear.