Tuesday, October 9, 2012

Retrieve the Guns!

So last night I hosted our game as the usual venue was closed for refurbishemnt. We decided to do 15mm Colonials for a bit of light heartened fun using Battles For Empires v2; it's not out yet but the QRS is on the yahoo group and Chris has kindly talked us through much of it. I also had printed off the random event cards from http://www.angelfire.com/games3/jacksongamers03/colonial_card.htm which looked like they'd add something to the game.

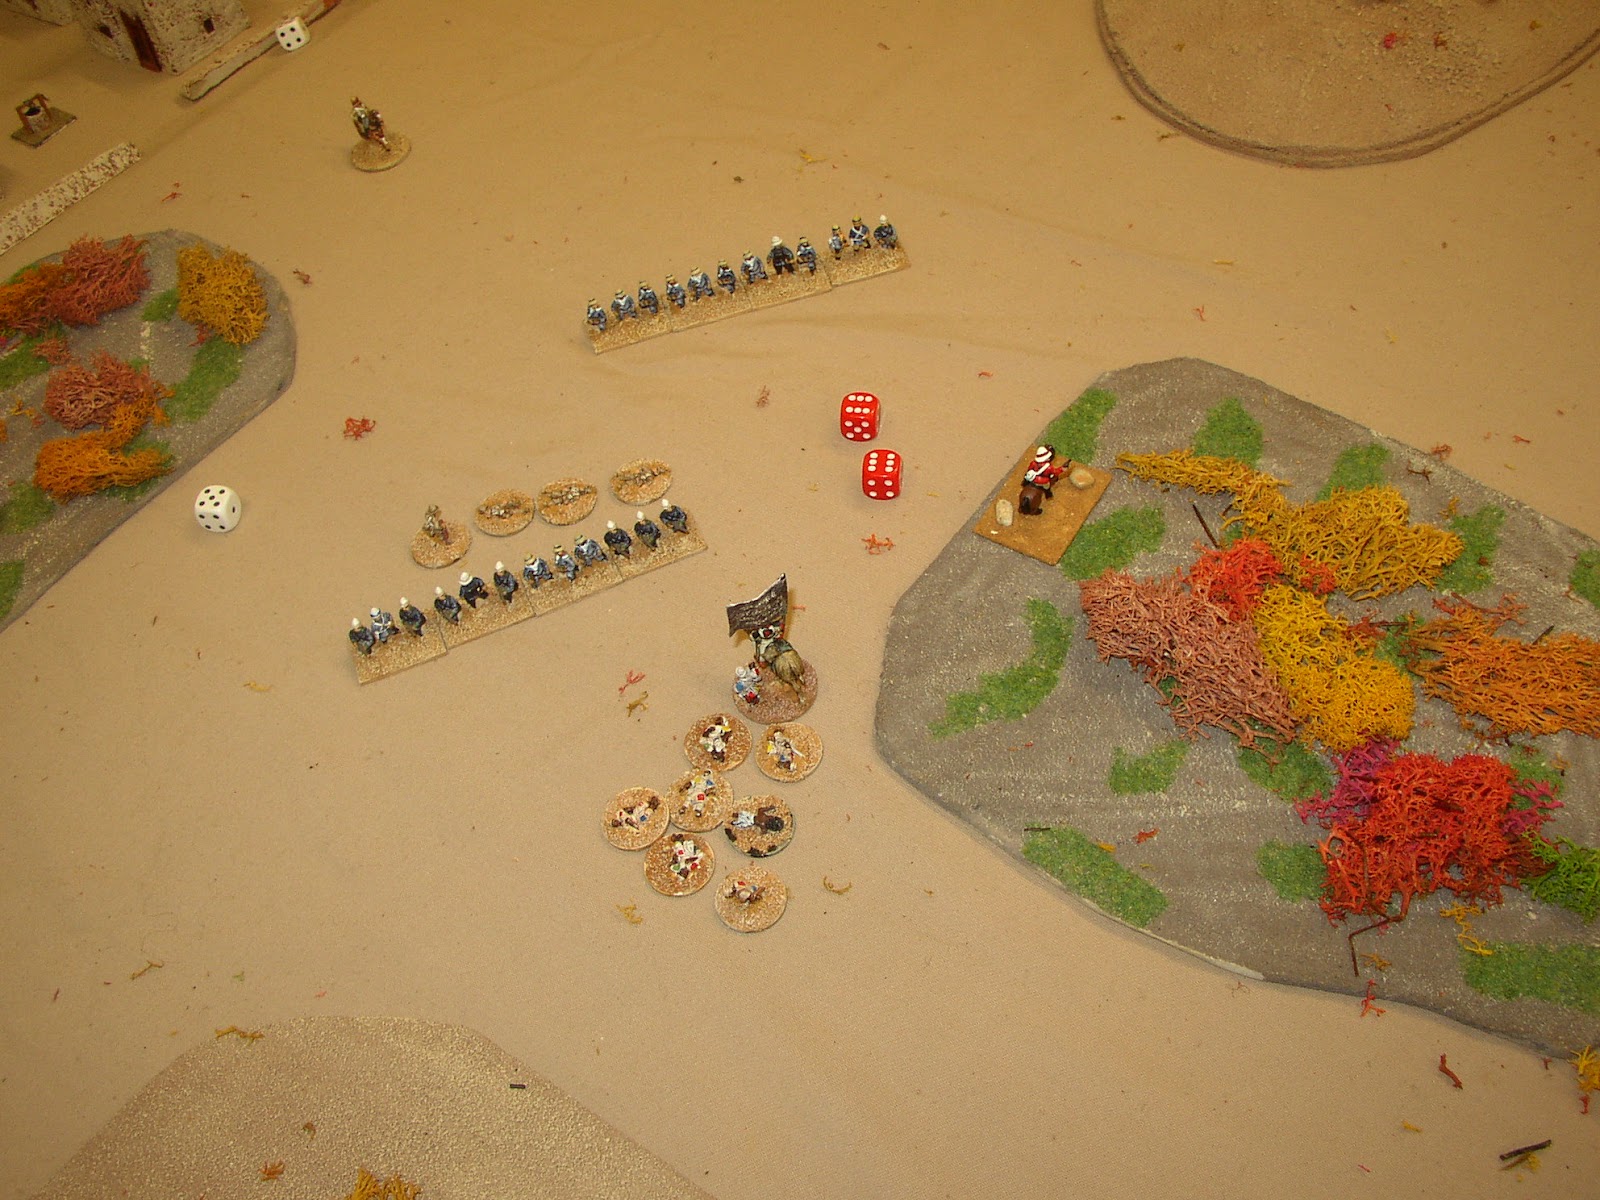
The dastardly Dervish had captured some fine artilelry pieces from the British and planned to use them against river traffic and so prevent use of the river by the British. The old Coptic monastery (centre left of pic) had been identified as the location of the guns, accordingly the British mounted an expedition to recapture the guns and teach the Dervish a lesson. 


In charge of the Dervish was El Al with his two trusty lieutenants Al Shepaheed and Al Rojar, they had 4 cavalry units 5 skirmisher with rifles, 3 spear armed units and 3 smoothbore guns.

The Imperials were commanded by Colonel Unwin with 2 companies of British foot and 1 cavalry. He was assisted by Major Kiwi commanding the Egyptians, 2 Infantry , 1 cavalry and 1 arillery and also Lieutenant Manley who by co-incidence had the naval contingent, 1 unit of sailors, 1 unit Marines and a field gun on the paddle steamer.

The Dervish Decided to ignore the town and protect the passes to the old monastery; the Imperials when for a split attack with the Naval troops securing the town and docks whilst the Egyptians and British lines went for the shortest and supposedly quickest route.
  Lieutenant Manley arrives on the paddle steamer.
The Imperials aim for the quicket route. Far centre the Dervish cavalry cover the rocky hill and rough ground threatening the British cavalry.
Dervish skirmishers disorder the advancing British line... then take a kicking for their trouble.
The Dervish cavalry are charged by Egyptian cavalry who were behind the British cavalry... they'd rode on past by this stage.  The Dervish had already taken hits from the gunboat to their rear when hit, they needed to roll big to do well in the combat..... Oops.
Meanwhile the British cavalry hairs up the table to take the monastery only to be intercepted by Devish mounted. Egyptian Infantry advance to support them.
The Dervish throw in more units whilst the cavalry slug it out. Gordon Pasha, long thought dead arrives to take command of the Imperials for a turn giving them all +1 on Unit Conduct Chart.
 
Britiah and Dervish mounted wipe each other out leaving infantry to finish the job. Meanwhile the British foot, after taking a kicking from Dervish artillery on the hill finish of the flanking Dervish. The Dervish got the Belch of Alah card and gained an old 12pdr gun to help them out on random events.
Naval contingentt finally disembark...but Binky Pasha now turns up and takes command. The bumbling bafoon gives all Imperials -1 on UCC and they suffer for it.
Egyptian cavalry and Dervish destroy each other.
The Naval boys advance out the town but there's no one left...
The last Dervish mounted go for a valiant charge, both units die to a man...
   Dervish foot sally out to charge the Egyptian  infantry led by El Al himself!!
El Al's unit vapourise and double 6 means he's gone too!!
 

So in the end it was more or less a draw, with both armies almost wiped out (army morale is so passé), the British made it across the board although in hindsight might have spent a couple of turns to take out the Dervish artillery and wait for the Naval contingent. They only had the Egyprian arty, 2 naval companies and the naval gun on the boat left, the dervish had 3 units of artillery, 1 unit of massed natives and El Al was dead.

We are still not sure if we are playing it right as it's based on the QRS and various notes from Chris. The Dervish artillery seems much more effective now since all hits are kills (each unit can take 8) and they are carried around with you; in v1 where units could take 4 kills only the Dervish smoothbores generaly only did 1 hit which caused disorder and no kills, only if they were lucky and you were in close range did you suffer 2 hits to cause a kill.

Either way good fun all round.

Saturday, September 22, 2012

Neck of the Swan - Wetteren Sept '44


Neck of The Swan, Wetteren, Belgium, Sept 1944

The Pre-amble

So having finally sorted my new garage and organised my storage I decided it was time to have the grand opening of my gaming room. I wanted a good sized multiplayer game to be played over a couple of week. I opted for WW2 as each player could command a company and I’ve been desperate to

a)      get motivated to finish rebasing my infantry
b)      paint up some of the backlog of buildings and vehicles
c)      become more conversant with BGPG2 ruleset
d)     get my hardly used WW2 toys on the table.


For the scenario I picked this one: http://www.fireandfury.com/scenarios/wettern.pdf
Kindly put up for sharing by the Fire & Fire Battlefront WW2 players. They have a full selection here of great scenarios http://www.fireandfury.com/scenarios.shtml. Many thanks to them and in particular R. Mark Davies, who helped me out converting it for 20mm and the BGPG ruleset.

Since the scenario is documented above I’ll leave off OOBs etc… and stick to pics and the exciting action.

Here is the initial town layout. The keen observants might notice some additional track road added in later pictures, I’d forgotten to place it at this point.


We had 3 players on the  Brit side, each commanding a troop with one acting as senior commander to make decisions and hand out Action points; the Germans also had 3 players, 1 CO with the pioneers, mortars and AT gun whilst the other two took a company each.

Before we proceed I apologise to those that feel I’ve let the side down with some unflocked bases, the players cared not and although I prefer to have all figures completed I was stepping in to replace a planned game that could not go ahead. I had intended to do the game in a few weeks so had to make do.

The Battle

 The Germans deployed in two concentrations with a company each, one to advance parallel to the water edge taking the fields between the town and the river Schelde, covered by yhe AT gun. The other supported this assault from the North. The mortars far out of sight and the pioneers held in reserve to do their job.

The Brits have few troops and can’t hold a full perimeter so elected to hold North and south ends of the Bridge and the far NW of the village, each area holding 1 troop plus their supporting vehicles.

Germans advance across the open as their first move, not bothering with smoke or clever stuff like that and paid the price, very quickly losing a platoon to fire from the houses and .50cals on the halftracks. The support from the North pushed through the woods to set up position to help out.

The Germans were not helped by losing control of the game by failing command rolls twice and going FUBAR in the first couple of turns.

The Brits in the NW buildings soon came under fire from the assault to the North so could no longer support those covering the fields. They managed to prevent the Germans exiting the forest completely but could not halt the swing around on the German left which could cut off any Brits to the West. The Germans also pressed on their assault pouring in 2 more platoons and managed to clear the troops defending the hedge on the edge of town to take the first row of houses.


Continued heavy firing by the Germans to the North managed to suppress the Brits and the Germans lined up for the house to house assault.


The assault is a huge success after the early losses and setback and the Germans are surprised to find they come under no further fire from the houses in the centre of the board. In fact the solitary Brit stand squad that runs for cover to the bridge makes them realise the Brits do not control any buildings on that road. Desultory fire from buildings NE of the bridge indicate there are more enemy there.


Meanwhile a straggling unit of panzergrenadiers move East along the roas South of the river attempting to find a way across, the Brits on the south side move to counter this threat.

The Germans consolidate in the outer houses and the Northern advance continues to link up with it.


You’ll notice now some of the Germans bases have been finished – I was busy over the weekend between sessions :-).

On the Southern side of the river the British attempt to use the halftracks to prevent the Germans from moving towards the bridge but the AT gun and MMgs return fire to quickly put the halftracks out of action.


For the Brits Lieutenant Colonel AD Hunter now arrives on table and speeds off to meet Major Fitzgerald. The British now prepare to defend the bridge  and ensure Fitzgerald gets away.


The Germans now prepare to assault the yellow topped building to cover their final assault on the bridge. Meantime British AFVs rush forward to block any German plans to control the roads. The AFVs are soon dispatched but not before allowing Fitzgerald (Humber LRC top left) to get away and call up reserves. German pioneers make their way through town (far right).


The Germans find no one in the yellow topped house and British firing fails to prevent them taking up residence. Just as they pile in the cavalry arrive. Cromwells roll into town but tread wearily as the Germans are bristling with schrecks and fausts.

To get more cover the Germans call in smoke on the bridge and advancing armour. A Firefly appears in the NE of town (bottom left).

German infantry rush across the North end of the bridge and take the final house needed to cover the pioneers. Again lack of firepower prevents the British from stalling this attack


The British armour risks the AT weapons of the German infantry and zip through town to protect the bridge as the Germans have now moved the pioneers into contact with the bridge. It’s looking desperate for the Brits.


Meanwhile further British reserves arrive on the scene only to be met by the mmgs now controlling the roads in and out of the Eastern side of town. Those Brits that make it are hampered by smoke.


The Germans bring the fausts round to the Bridge and brew up a Cromwell whilst a brave Dingo attempts to mow down the Germans loitering around the bridge. The straggling Panzer Grenadiers continue to advance towards the bridge hoping to escape capture.


The German company commander brazens the Bren fire from the Dingo as he calmly waits for the pioneers to set the charges an his infantry exchange fire with the British in the houses on the South.


The Germans having laid their charges vacate the area and blow the bridge first time round taking down the poor Dingo in the process, but leaving their fellow stragglers to the South to spend the rest of the war as POWs. In final insult to injury the Firefly goes up in smoke.


The Autopsy

My table is 8by6 but I like a bit of space around so I used me 7by5 terrain sheet and compromised the map slightly. 

Historically the Brits won, but it was very close. They were engineers, not ideally suited to holding a bridge against determined enemy. That said they performed well and repelled the assault leaving the bridge clear for the advancing formations to cross the river.

As for the game, well, the British players felt they had too little a chance and the Germans players thought it finely balanced and a great result… Go figure :-)

Lack any real support weapons other than the .50cals hampered the British but the Germans and myself (as umpire wondered if they’d  bitten off more than they could chew and tried to hold the town too far out with the 1 troop. Once the Germans were in a position to attempt close assault on the first house the British had little support fire from neighbouring houses. After that the Germans actually reached the bridge unscathed more or less.

This was stark contrast to the early moves when the Germans took heavy casualties trying to move parallel to the river. The straggling Germans were just added early to give the Brits more to think about as it looked like the Germans were due to be trounced. In hindsight they were unnecessary.

I did bring forward the arrival of the reserves as after the initial setback it then looked like the Germans would reach the bridge very quickly. Even so they were unable to prevent the German success. A key point was that German mortar fire in the first two sessions was ineffective and actually caused friendly fire!! In the last session it was always spot on!!

The British suggestion to ‘balance’ it more was to have Germans start further back to allow more time for the reserves since more troops would patently be against the historical oobs. The Germans and I all thought the Brits could have held a tighter perimeter. The players did not ‘know’ various deployments but the clues were all in the briefings, the British could have chosen to effectively ignore the South side and just left token resistance there as a calculated risk; they had after all technically arrived from there the previous day.

Either way all had a good time and if the autopsy starts pointing fingures at leat you know they cared and were involved and hopefully had a good time. We might try again something swapping sides just to see how hindsight changes things. If any one else tries the scenario let us know how it goes as we’d be interested to hear.


Tuesday, September 18, 2012

FWC Mad Max Style

4 of us in the end last night for the standard 1000ap Mad Max style, no air, no arty, no massive, no minima, all rights reserved blah blah blah.

Graham had threatened to come late but came early and threatendd to leave straight away instead. Mike, Paul and I persuaded him to stay. A decision he shortly came to reconsider.
I took the pink menace with 2 Arkalsts and a pimped up CO at double cost for CV10. Mike took Eldar (4 serpents plus carried infantry), Graham borrowed my Marine Corps (IFVs, Bikes, Grav Bike and infantry) and Paul had his Stargrunt human army(IFVs with SMs and infantry with SM upgrade).


T1
We each took a corner and used static deployment. I reminded every one that Arkalasts have Pulse. This was important. Graham headed toward the centre of the table but fell short of the BUA (cover lvl 5) in the centre. Mike headed to his left to approach Paul. Paul borowed from the Pax Arcadian Advanced Tactical Manual and set up shop in the nearest cover and gave Mike a bit of kicking as Mike tried to approach him. I headed left toward Graham and started to give him a shoeing at long range.


T2
Next turn Graham reformed his battlegroup to come and get me then promptly failed his command. Mike took cover to protect his forces. Paul re-arranged his lines in the cover. I proceeded to wipe Graham off the map. He had limited the effect of pulse but 2 Arkalasts at under half range with free opportunity fire, initiative fire and 3 command turns are very unforgiving, particularly this last roll....


T3
Unsurprisingly Grahma failed his army break and left the table. At this point Graham may well have considered going home. Mike brought some fire to bear on Paul with limited effect. Paul decided he'd had enough and wanted to take Mike down so broke cover and set up in a nice lone battle line…and failed his next comman roll. An Arkalast's wet dream, all I needed were 2 good moves to get around on to his flank. Proof positive that the Kraytonians are truelly blessed in the eyes of the creator… I rolled snake eyes and got 2 goes. Paul managed to suppress 1 Arkalast but the other had a perfect shot along the line. At this point I'd like to thank Paul Stanton for introducing us to the wonderful straight line laser that clearly showed Paul Harris' units were in for a kicking (see the red line in the picture). As it happened I destroyed very little but I did suppress most of the line and importantly those that were facing off Mike.


T4
Graham deployed his 2nd army, using MC again… and failed his first command roll. His evening was looking bad. Mike, now overjoyed that Paul was suppressed promptly swung around Paul's right flank and close assaulted him. Paul saw off 1 assault but lost the other and also lost a subsequent assault then Mike ground to a halt still facing down Paul's flank line. Recall that Paul's troops are in a big long line, at the other end of which are 2 Arkalast and me with a laser line… Paul fired off what ever was unsuppressed but to little effect then failed his command. The Arkalasts now had a field day, the live was so long I even ended up rolling 1 dice against Mike's poor infantry. Having taken both Mike and Paul to well below break I then moved to the central BUA as I knew replacement armies were coming right behind me. Sadly for me I didn't quite make it there which proved to be critical.


T5
Graham manages to get his troops moving and gets in range of my Kraytonians and more importantly shoots on their rear scoring a suppression. Mike fails break with the Eldar so leave the table. Paul with a high CV passes so send his remaining troops into cover towards me. With only 1 tank unsuppressed I turn to face Graham, as it barely twiches Graham opens up scoring hits but no suppression. I turn and waste an MC IFV but then fail command. I now have 1 tank facing Paul and the other facing Graham and in a mess as 1 of them can constantly suppress me.


T6
Graham reforms his troops, I opportunity fire and get a kill but then get suppresed as Graham amasses fire power against me. Mike arrives with new Hunter Scavengers and moves toward Paul's remaing troops. Paul fires off smart missiles at me scoring hits but no suppresion.


T7
Graham arrays his MC in a splendid line a mere 10cm from my tanks, opportunity fire knocks down another of his units but he can afford that. Electing to fire rather than assault he scores a suppression on me then fails command. Mike fails command straight off so does not move. Paul fails break so leaves the table. I turn my unsuppressed tank that was facing Paul to face Graham. Opportunity fire from Graham score hits and suppression so my go is over.


T8
The zenith of Graham's FWC gaming arrives. Under initiative he pours 32 dice needing 5s into 1 Arkalast. Scratch 1 pink menace. Under command he repeats the process but I manage to save some hits and am still on the board. Graham passes his 2nd command roll and another 32 dice say the remaing Arkalast is toastand I've no units left.


At that point we called it as it was 10.45pm and with the Kraytonians dead the evening wasn't going to get batter than that for Mike, Paul and Graham.

Great fun and we all laughed, particularly hysterical was Mike's recon roll at 5cm away… Don't roll a '1'. Take a wild guess!!

Important safety tip: Always remember Arkalasts have pulse
Oh and no blunders last night either. One double '6' but that was for Mike's break rather than a command roll. Mike and I both had a doubel '1'.


Monday, September 3, 2012

HOTT Dwarves - 15mm

So we've just finished HOTT Berkeley 2012 and here are some pictures of the army I used.

I'd had the figures lying around for a long time begging to be painted but wasn't motivated. For HOTT Berkeley I always do a momento for the attendees to make it a bit special... not that it isn't special enough of course but it's nice to take something home.

This year I'd left it late to sort out so was in a bit of a panic but then a discussion ensued regarding my 25mm Dwatven mine (http://web.onetel.com/~stenic/Wargmes/myarmies/hott/HostofMinehelm/Host%20of%20Minehelm.jpg) and Shaun of Dreamholme Scenics reckoned he could knock one up to fit a 15mm HOTT Stronghold.

I got the army painted in time for HOTT Berkeley and Shaun was true to his word providing 24 of the mines.

Here is the full army:

It consists of 4 Blades includingthe General with the Standard, 1 Hero, 1 Sneaker (to test the revised Sneaker rules), 1 Artillery and 3 Shooters.

A close up of the Hero:


A close up of the Artillery:

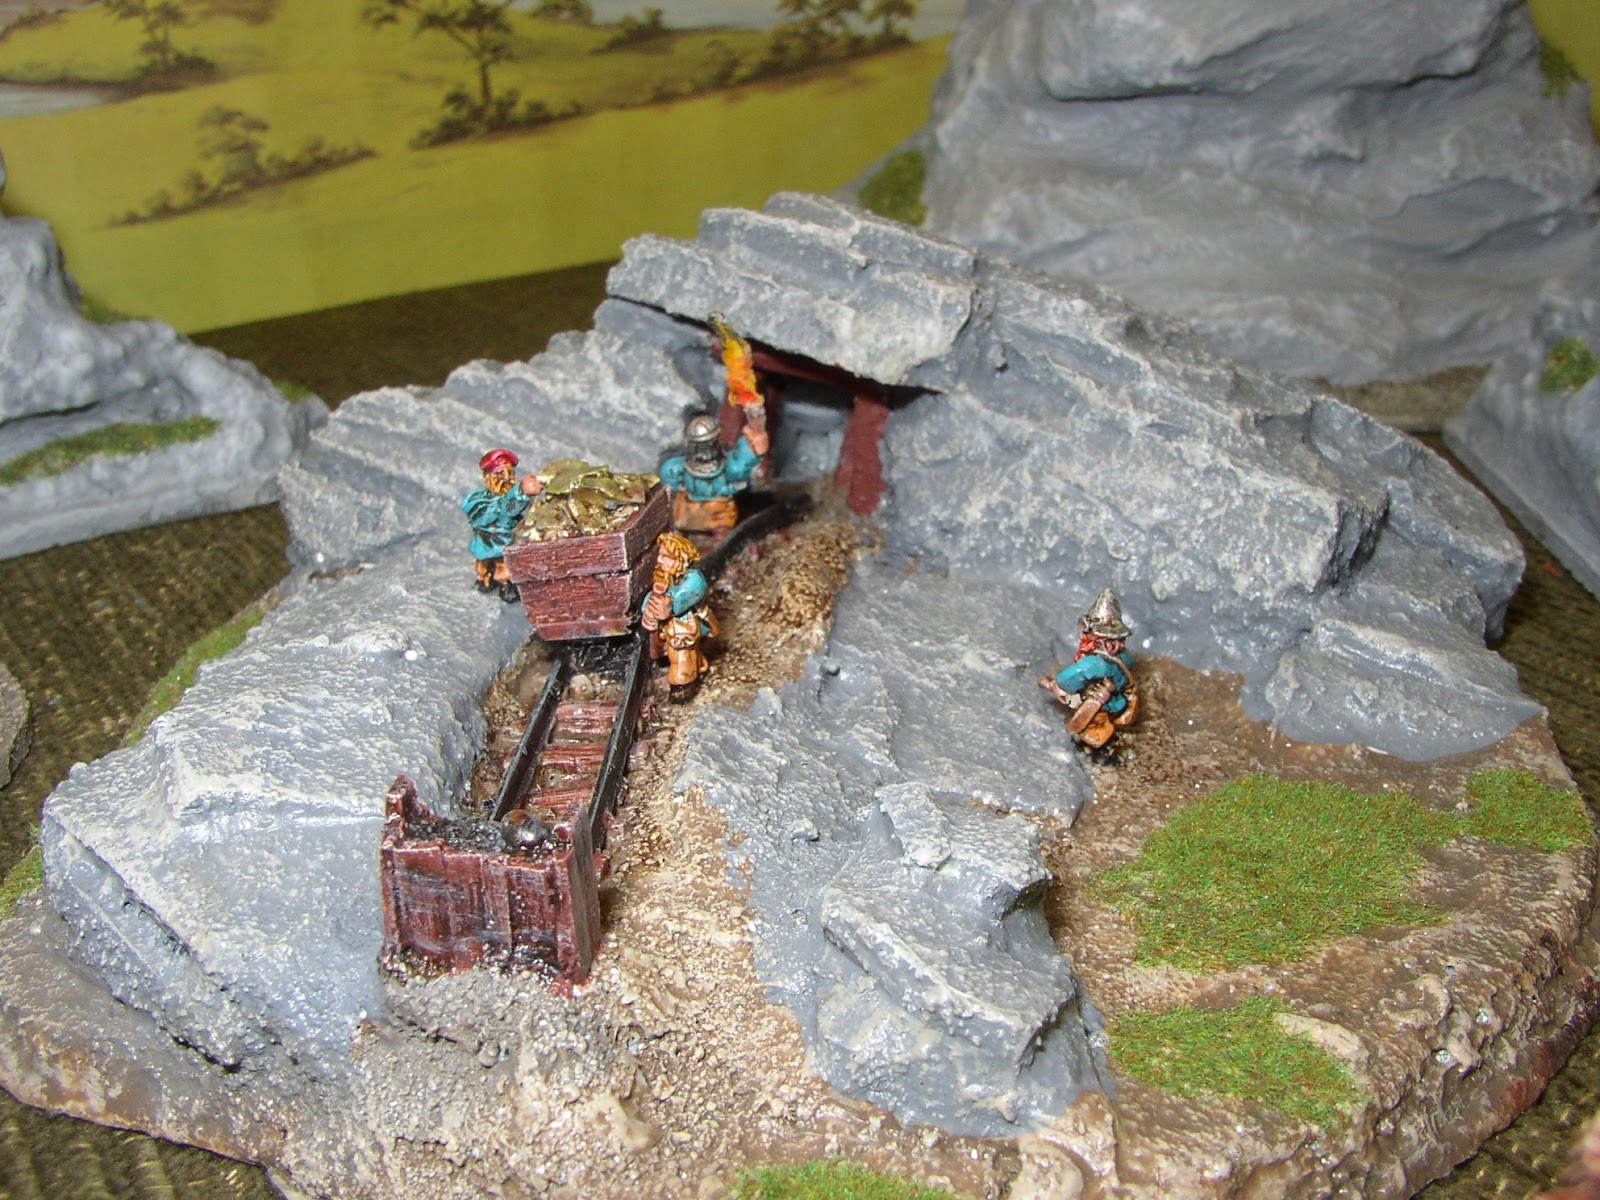
The mine entrance; I added the spare figures from the army to make it look like something was happening, one dwarf entering the shaft with torch, two messing about with the gold truck and one wondering up to see what's happening.


Another shot of the mine.

The back of the terrain item has a badge detailing "HOTT Berkeley 2012". I understand from Shawn these will be available from his online shop at some point although without the badge that makes the 22 people who got one at HOTT Berkeley 2012, plus one very lucky US tourist to the UK and 1 lucky no-show, very special people indeed.