Tuesday, February 5, 2013

PAW 2013

Every year the Berkeley Vale club pop down to Plymouth and attend PAW, this year was mo exception and I entered the 25mm FOGAM tournament.

I selected Later Seleucid and had
2*2 Companions elite drilled armoured lance sword
1*4 Agema Sp drilled cats lance sword
2*12 Pike Ave drilled
2*2 Elephants
2*2 Scythed Chariots
1*6 Thorakitai ave MF drilled armoured OF
1*6 Archers poor LF Bow


First game vs Mat and Later Carthaginian.

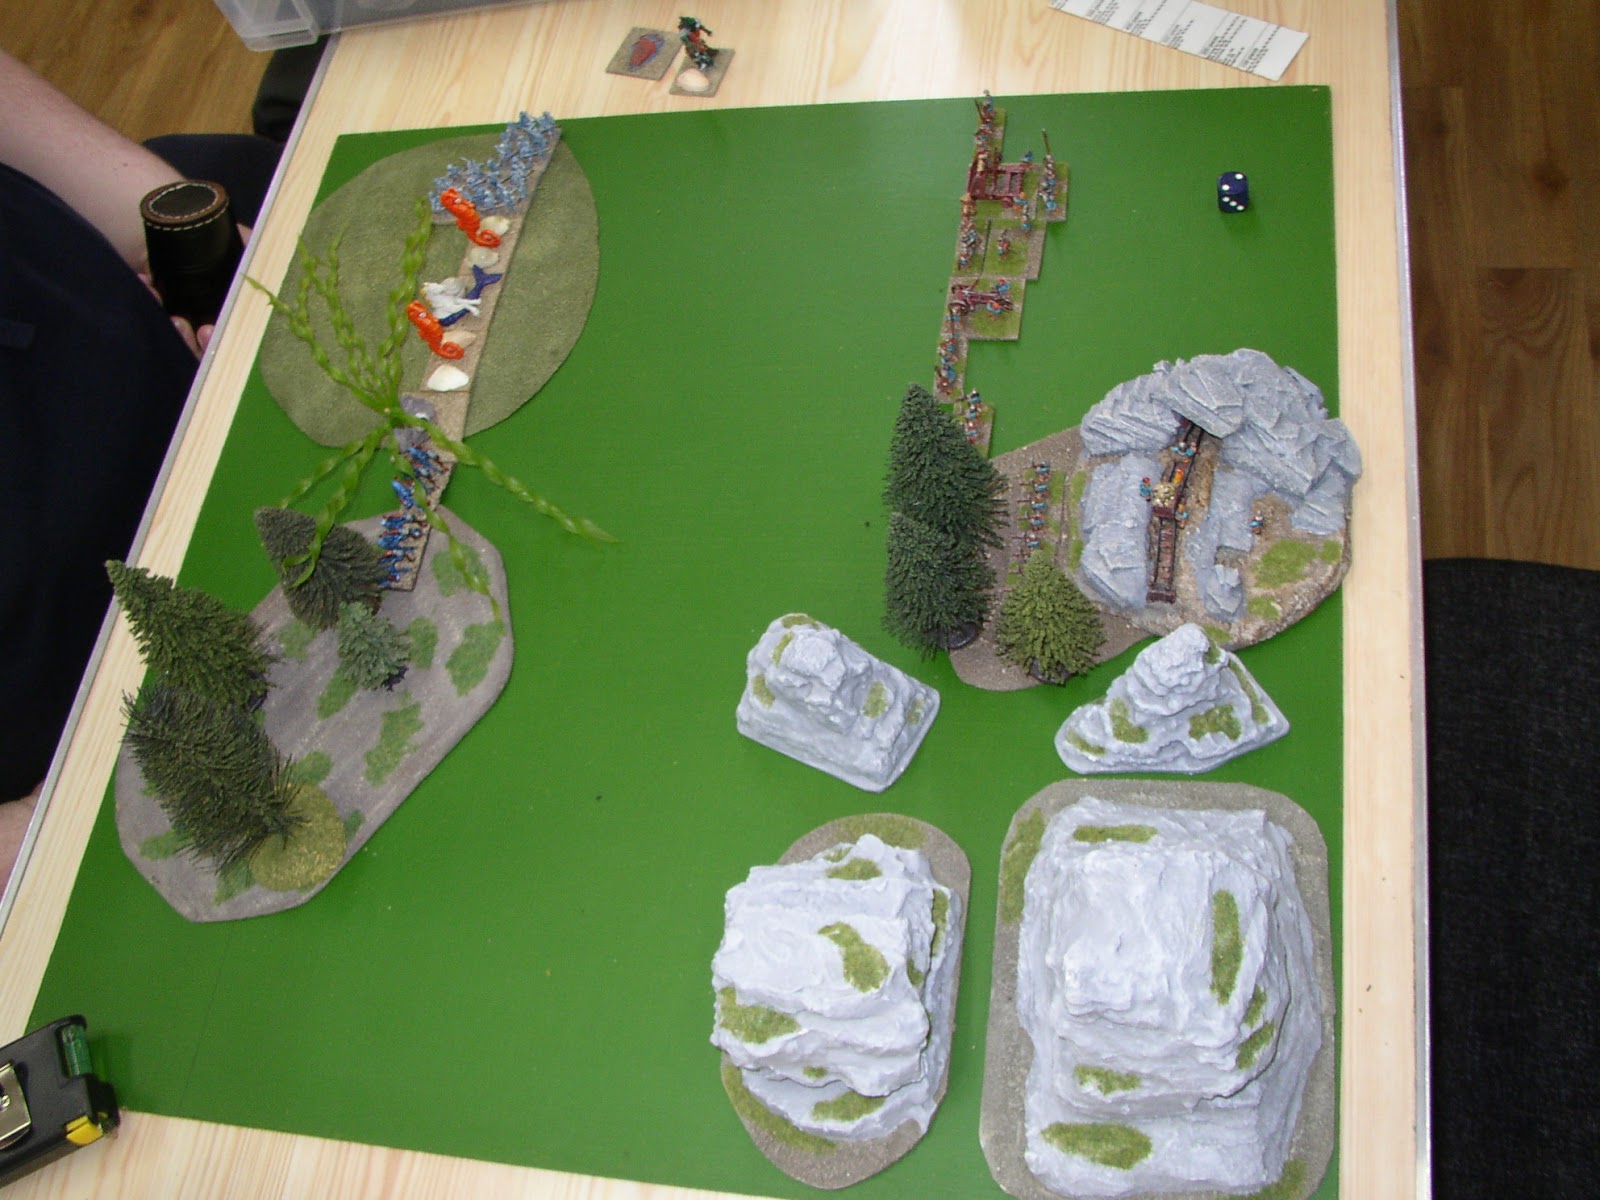
Battle line are drawn.

Matt's right flank.
 
 Matt delays with his LH whilst I push forward, his battle line scramble to re-align in the centre.

My right pushes forward, the Thorakitai head forthe village supported by pike.

My left catches the enemy cavalry.

Pikes and scythed chariots hit his infantry line.

The elephants batter through 1 cavalry bg and hit the next.

We have the village and the camp Sir!
 
 
Steam rollered through this game as Matt tried to re-arrange his battle line
 

Game 2 vs Richard Jeffrey Cook and his Mayans.

I've deployed too wide.

Dithering leaves me in a mess.

Penny packets go in. Don't ask why my Sc Ch are out onthe left, I've no idea.

Scy Ch race forward with companion support, Agema flank by elephants also race forward.

Shooting takes it tolls as we hit the line of Mayans.

And promptly lose along the line apart from the Cats that break a bg of bow.


It went rapidly downhill after that but I resolved to learn from the mistakes.

Game 3 vs Neil and his Ancient Brits.

Look, tight lines, rear support, flanks protected.


Opposite is just a bunch of hairy barbarians.

Neil skirmishes with cavalry and LH whilst I trundle forward

LF tease the MF in the centre, Sc Ch reasy to pounce, pike behind. Both companion bgs work to keep fending the LH jav from the elephants.

Neil's view of my army. No wonder he needed a fag break.

That gap between chariots and MF is just under 120mm so when I charge I hit both his bgs and will not conform. It's genius and I'm supported by the Thorakitai too!

In the centre hhis Impact MF charge my LF, I evade and he plows into the orange and purple ScCh. Another genius move. And the pike are supporting. It's a Seleucid dream, what can go wrong.

The left keeps pushing
Line are still tight, on the left I have companions and cats hitting the elite MF, I have lance and MF in the open... what can go wrong?

Well, everything it turns out. His MF go fragged to my Sc Ch but rally up in the 2 turns it takes my pike to advance into the gap left by the Sc Ch going in the JAP. The companions lose to the elite MF and the other companion bg break from 3 CT failures after javelin fire even needing 5+ to hit and I'm elite so should rally..

The one bright spot, my elephants and Thorakitai frag his MF. Big Whoop.

I did everything right that game except lose nigh on every impact, then fail CT then lost melee then broke down the line. There are no more picture because there was no more action, I just lost every subsequent combat and the army broke in minutes.

And then the day got worse.

Game 4 vs Andy.

I deployed wide but not to bad. It was open terrain and I was worried about flank marches.


I start to turn the pike but it's slow.

Overkill to defend my right but the pikes would never reach the left so might as well.

I re-arrange my left to fight off his hordes of cavalry.

At this point it almost looks ok.

My cats did route the bg opposite them but... My Companions either broke or died to death roll (2 base bgs!!) leaving the elephants and Sc Ch todo the job but they too failed.

I gave in to the will of the Gods when my Thorakitai on the right lost Impact and dropped then I rolled double 1 on CT for losing melee despite being a POA up and overlapping the enemy in melee (even dice numbers). I'd lost 8ap out 9 and lost the will to bother anymore. We finished the charge by my cats into a flank of his cavalry and I got an extra ap for them going to frag'd. Real big whoop.

So the moral of the sory is never take ScCh, never use companions in 2 base bgs as battle line troops and don't be so keen to watch the rugby as to screw up your deployment on Saturday afternoon.

Saturday, January 19, 2013

10mm Classical Indian (well painted) army for sale

Bought these for a brief flirtation with Warmaster but they have been on the shelf for a couple of years now and are feeling unloved.

Would suit other systems like FOG, Armati, DBA, DBM or Impetus although some sabot bases may be required.

Roughly 1500 points. I expanded the original army by adding 1 unit elephants, both the heavy chariot units, some more bow and 2 generals (1 on foot and the other on an elephant.)


I'm looking for £250 ono. I'll wrap each stand in bubble wrap for safety and pack them well for posting.

The army weighs about 1.7kg and the Post Office postage calculator reckons about £10 insured up to £500 next day delivery signed for. Worldwide is looking around £30. With each stand wrapped I'd need to use and A4 box file or similar size to post it.

Email me at stenicplus at talktalk dot net if you are interested.

Comprises of:

1 * General in chariot
1 * General on foot
2 * General on elephants

2 * 3 bases of elephants
2 * 3 bases of heavy chariots
2 * 3 bases of light chariots
2 * 3 bases of cavalry
2 * 3 bases of skirmishers
2 * 3 bases of infantry
5 * 3 bases of bow

6 spare painted bow figures for markers.


Tuesday, January 15, 2013

HOTT Barn 2013

I took my Dwarves that I used at Berkeley along with fine Dwarven Mineshaft from Dreamholme Scenics. I did however drop the Sneaker and added an extrat Artillery; so 4 blades inc General, 2 artillery, 3 shooters and 1 hero

The main hall at Lincombe Barn: 


Game 1 vs Sean and his Gray Aliens, or rather Tim's Grey Aliens. Sean is over from California and studying in Egham, he cadged a lift with the Staines Massive. The Grey Aliens had 6 shooters, Mage General, Behemoth and 2 Flyers. Sean defended and put down some woods which could help his shooters but hinder his flyers. I got my choice side and Sean had to deploy narrow. 

His army was pip starved due to low rolls, terrain and pip heavy units. This allowed me to advance my artillery into range. I knocked off as shooter who recoiled into his behemoth. I then sent the behemoth running to the edge of the table and set about sorting my battle line. 

Sean attempted to use the flyers to cause me problems but pips were an issue and he overlooked the position of his Mage General, just infront of the behemoth that was just off the table edge. My arty opened up and sent the mage general recoiling through the behemoth and off the table to give me the game.


Game 2 vs Colin O and his dinosaurs, 3 behemoths inc general, 1 flyer and 5 beasts. I defended and laid down the Dwarven Mountain in 1 quarter of the board with rocky rough going next to them and a gentle hill diagonally opposite. Colin failed to get his preferred side so I set up on the hill. 

My fear was the beasts outflanking me so I opted to have the blades nailed to the hill and arty and shooters to cover my right, hero in support. Colin tried a flank attack but after a knockback gave up on the idea and opted to assault the hill with behemoths. Colin's flyer swooped behind my lines but my shooter able to recoil it back over my own line so it died. 

More artilery fire meant his beast support could not reach my line and only 2 behemoths only got into combat. The behemoth general won and forced back a blade but the other was doubled and died. In my go I turned the flank on the behemoth general and destroyed him so getting the game.


Game 3 vs Benedict and his water themed army, Behemoth general, hero, 2 riders, 3 hordes, water lurker, 2 shooters and God!. Big grudge match as Benedict and I seem to meet most Berekeleys so no quarter was either offered or expected. I defended and declined to bother with water. 


Similar terrain as above went down but with woods as I had more shooters and he had the aerials. Benedict got his preferred side and the gentle hill. 


He then promptly came off it to avoid attrition from artillery. His hero and riders combo went straight in for the kill but were only partially successful takign down 1 arty but losing a rider and eventually the hero. The God arrived as the melee ensued and hit my arty but my blade overlaps meant I clung on for dear life and dressed my lines. 


I managed to get a shooter in trouble by leaving it no recoil against he impassable mountain and Benedict gleefully pounced to bring the scores closer. Benedict's God remained resolute and finall did for my arty whilst my hero and his behemoth were playing to-and-fro with overlaps each side. Now at 8-8 and I managed to turn the flank on Benedict's behemoth general and with the combat for the game.


Game 4 vs Tony Green and his Hoth Rebels, 2 heros (Leia and Han) Paladin (Luke), 4 shooters including the general and 2 flyers, not quite an uber army of old. 

I defended again and once more laid standard Dwarven Terrain Mk II much to Tony's despair. It went worse once he lost his prefered edge and I had the hill. Sadly no pics of this game as by this time I was pretty distracted by the intense game. Tony went for surgical strike with Leia leading some shooters through the rough but pip starvation slowed them down. 

Han and Luke tried for the gap between the hill and rough but pulled up once my shooters and arty swung to the centre to create the Valley of Death. Tony's flyers tried to pin my shooters but pips meant I was still able to intercept Leia (Luke's thought's gave her away) and her force. 

One of the flyers was shot down as my dice rolls became inspired and at this point Tony lost the will to live, he sent Han into my blades for a desperate bid to break my line, I recoiled but then in my go blew Han away with arty. A second flyer was then shot down and with no option Luke went for the Dwarven hero. Patently not yet ready in the force and unable to roll better than my 6s Luke bit the dust to give me the game.

So four wins out of four and 3 generals killed meant I won a fine bottle of Southern Comfort for 1st place.

I like the job Own did on his HOTT Berkeley  2012 memento, love the littel flowers:
 
Again, thanks to Nick, Craig and the gang and see you all next year if not sooner.

Steve 


Tuesday, November 20, 2012

Battle of Intombe River - Sudan style


For our club’s regular Monday game I ran a Sudan version of the Battle of Intombe River on 19th Nov 2012. The chap with all the Zulu stuff was otherwise engaged and as all I have is the Sudan stuff it made sanse as it was within period. 

We use Battles For Empire for out Colonial rules by Chris Leach as they seem to produce a game that for us feels right for the period. There is a yahoo group for discussion on the rules and also said scenario in the files section.

I set the table up as per the scenario, the scenario allows the Brits some leeway in deploying tents but for a first go we did it ‘properly’. We used a 6by4 table with 15mm figures, my Imperial are based 3 to a stand and each stand is 3cm wide, natives are 5 to a stand and each stand 6cm wide. Each unit has 4 stands meaning an Imperial line (4by1) matches a massed foot formation (2by2). Each pair of tents represents a commander or unit for the British, the rocks in the river show the location of the ford.


Alan Millicheap led the Dervish on the left, Rodger Williams running the centre and Alan Paull of Suprised Stare Games on the right. Shaun Mutton of Dreamholme Scenics took the British north bank, a hospital pass if ever there was one, whilst Graham Bevan took the south bank; their mission is to get of the south edge of the board with 3 units (so get 1 off the north bank to the south), the dervish just have kill 4 units thus prevent 3 escaping.. I umpired, took pictures and generally had a great time.

The Dervish deployed right up tight to their allowed distance on to the table so only cataclysmic results would prevent a historical opening of the battle. The Dervish now won the first of many critical initiative rolls and charged.

Initiative in BFE can be critical at certain times in that you may want to get away or force your opponent to take his Unit Conduct Chart (UCC) tests before you. In this case it’s important as the Brits have to try and wake but if the Dervish move first they can be on to Brits in turn 1 (which is historical). Sure enough Captain Moriaty outside the apex of the laager was overrun in turn 1. A unit on the left flank was also hit with a rude awakening whilst the rest of the Dervish tore through the larger. The Brits did manage to wake the units on the south side, one in the middle of the laager and one on the left flank.

The Dervish start with 10 units out of 30 on the table, dicing twice for reserves each turn from the 2nd onwards; I used the Zulu reserve charts so we could replicate the Zulu Chest, horns and Loins tactics that the scenario dictates. As it happens we could have saved time and given all the reserves to Alan as on turn 2 he managed to get 2 lots of 3 units on to the left horn for himself (top right of picture).

 
This continued for most of the game until the last couple of moves when the Loin chart was finally activated and Rodger got a couple of units in the centre. Alan Paull got no reserves but his team graciously let him have some of theirs.

Whilst the Dervish now poured through the laager one British unit take the sensible precaution of backing off to the other side of the bank. Meanwhile the loud screaming and gunfire appears to be insufficient to wake a unit of British. The British on the south bank elect to retire to try meet their victory conditions.


Turn three see one British units wiped out whilst the one on the far left comes under attack. The British on the right finally wake after the Dervish actually clamber into the tents and set about. The unscathed unit continues to negotiate the swollen ford.


The sleepy British lose their unit on the right but the south bank units realise they only way to win is to ensure 1 unit gets of the north bank so they push back up to provide covering fire. The British to the left see off a unit of Dervish as the initiative roll becomes all important again. The Dervish are no in a position to catch the unit in the river if they move first.


The Brits win the initiative and the unit makes it over the river to join the other 2 units. Meanwhile the last British unit on the north bank is dispatched. And the Dervis pour across the river.

Interpenetration in these rules is limited so it’s important to ensure commanders are in the correct place to affect UCC rolls and the order of picking units requires some thought. The mass of troops often means a log jam for the native troops in these rules and this scenario was no exception for the Dervish trying to follow the Brits across the ford; co-ordination is key. Of course it wasn’t help by yet more reserves arriving at the Devish left horn, all trying to get to the river.

The trick for the British is now to stall the Dervish by having the lead units fail UCC rolls and paralysed as a result, this would mean the Dervish would be stuck and those behind also stuck. Catch-22 is that to do this they need to score hits and accumulated hits result in destruction of the unit thus clearing the way for other units to plough through. So it is a meat grinder but actually quite tense as if the Dervish can contact the retreating line and cause hits the British will crumble due to attrition.

As it happen the Dervish now get a unit across and crash into the line .


Volley fire sees said unit trashed at no cost to the British line.


Calamity now for the British. Using commanders to boost the UCC result the Dervish get 2 fanatical charges as they exit the river and they smash into the thin red line. Desperate point blank fire and hand to hand combat see both the fanatic charges destroyed but the central British unit took a beating and is on 7 hits, 8 and it gets destroyed.


The British kept gradually retreating but did not take measure to protect the damage unit, mind you, with 7 hits it would struggle to get a decent UCC result to escape anyway.

More Dervish now pour across the ford.


Those units are shot down in an astounding round of firing by the British and destroyed. However it reopen the space for more Dervish to race forward. Meantime the Dervish have instigated a ticketed queuing system on the north bank so that the fording is orderly….


More devastating fire decimates the Dervish but there’s thousands of ‘em and they are now out of the river in force….


And eventually numbers tell. Despite taking 7 hits on the way in a Dervish unit hits the central British and scores that all important last hit to wipe out the 4th unit.


So a win for the Dervish and pretty much spot on to the historical result. In reality some troops did make good their escape but not thanks to Lieutenant Harward on the south bank who ran off and left them, nor Captain Moriaty whose incompetence got him killed right at the start of the battle.


The scenario does have to potential to look like it’s a case of mowing down natives but no more so than playing Rourke’s Drift. The odds do not favour the British at all and they need the first initiative and to get everybody awake then they could possibly sacrifice 2 units on the north and escape with the rest, but that’s a lot of luck needed. Re-positioning the tents and making the laager effective (as was recommended historically by Major Tucker) would give the British a much higher chance.

The bottleneck of the ford means  the natives need to be organised as they cannot deploy on the south bank – I did wander about this as the scenario does not say, but I assumed as the river was swollen and that was the only ford about that the natives were restricted to the north bank.

All in all another good fun game brought to you by the Berkeley Vale club.